Animated LED lighting takes your terrain from being great to being OMG WOW.
We already covered the easiest way to add LEDs to your tabletop terrain and miniatures without soldering, but you don’t want to settle for bare minimum, right?
You can do it! If you think using anything but off the shelf static or flickering LED effects is beyond you, think again. If I can do it, so can you.
What is Arduino?
Arduino is the name of an ecosystem of electronics boards, software, and code that allows novice electronics students and hobbyists to create projects from art pieces through to product prototypes. While it is not the only product on the market, it has one of the largest communities of open source contributions, making it cheap and easy to get help.
If you want to learn about Arduino, I have a full, free course at Maker Hacks and on the Maker Hacks YouTubes, but you don’t need to learn all about electronics or microcontrollers to get some great, atmospheric lighting effects at your table.
The Arduino community is so huge and helpful, there is almost always a tutorial to follow and even copy and paste code that does what you need. I will supply some to get you started here.
What you will need
- Arduino board – These can be acquired in many shapes and sizes, from Amazon or the usual auction or overseas outlets.
- 5v LEDs – You will need as many LEDs as your project requires plus a few in case of duds/burnouts.
- Wires – Some way to connect the LEDs to your Arduino.
- Resistors – If in doubt, get 220 ohm resistors, they will be good enough.
- USB cable – Usually but not always something that comes with the Arduino
- Power supply – Depending on the specific board you get, either 9v DC barrel jack or 5v phone charger.
- Bread Board – these are boards with holes in for you to plug wires and components, they make solder less prototyping easier.
- Possibly a soldering iron (recommended if you want your project to last long-term but not necessary for one off games or if you won’t be moving things around a lot)
Should I sell pre-made kits?
Depending on supply-chain issues and such, I could make up some kits that are already soldered and programmed, ready to install in your Terrain. Would that be of interest? Let me know with a Tweet or an Instagram message!
Wire it Up
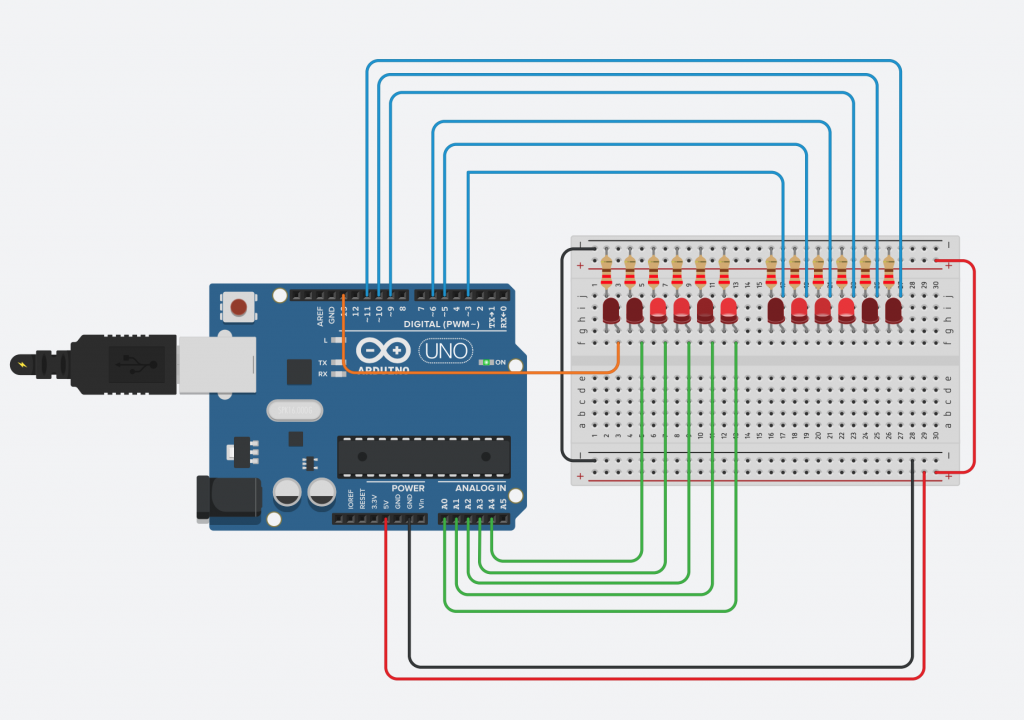
Your LED will need to be connected both to an Arduino pin and to Ground, the latter via a resistor to prevent the LED drawing too much power and burning out.

Notice on the Arduino the pin holes have labels, some are numbered and others have names or letters. We are mainly concerned with the numbered pins right now.
If you were to add to your Arduino code the following …
digitalWrite(9, HIGH);
… that would be saying that you want to turn on the power to pin 9. Changing HIGH to LOW would turn it back off.
The numbered pins also sometimes have a tilde ~. That symbol means the pin can supply a variable amount of juice to whatever is plugged into it, so with our LEDs we don’t have to choose between just on or off, but also variable brightness in-between. We use analogWrite for this, supplying a number ranged between 0 and 255 for the brightness:
analogWrite(5,100);
On my Necromunda terrain piece that I made from junk rescued from the recycling bin, I have two alternating landing lights for the landing pad, a randomly flickering light to make it seem like the light is broken, and two purple lights on tall radio towers which fade in and out.
All of those use variations of these two approaches.
Arduino Code
Turning an LED on or off is called “Blinking” an LED, and Arduino comes with example code for that.
The next step up is “Fading” an LED from off to full on then back again. There’s also code for that too.
Where I got tricky with mine is I do a variety of things at once, almost a brute force multitasking kind of thing:
The way I achieve that is the pins are written based on the result of functions, one blinks, one fades, and another provides a random value.
So if you wanted, say, to add a flickering flame, you could attach a yellow LED and use an extra pin called FLAME and use
digitalWrite(FLAME, Flicker());
Make Sense?
I want to help you build the best tables that you can. Is there a way I can make things clearer or more advanced? Let me know!
And should I offer built or DIY kits? Again, let me know!

 Transparent PVA + Acrylic Terrain Sealer